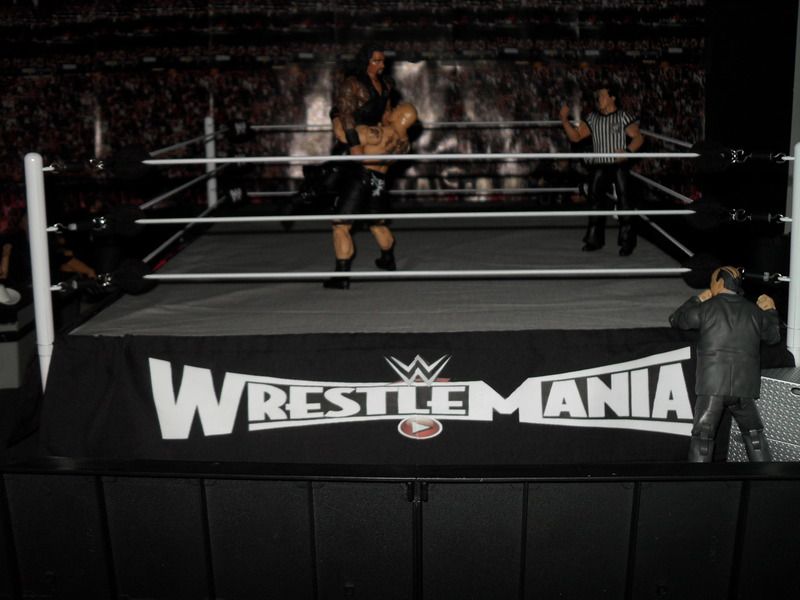
Completely custom wrestling ring - 3D Printed kit
Jan 21, 2017 6:26:20 GMT -5
naparo01, hCo.Bro™ [brandon_lee], and 9 more like this
Post by Deleted on Jan 21, 2017 6:26:20 GMT -5
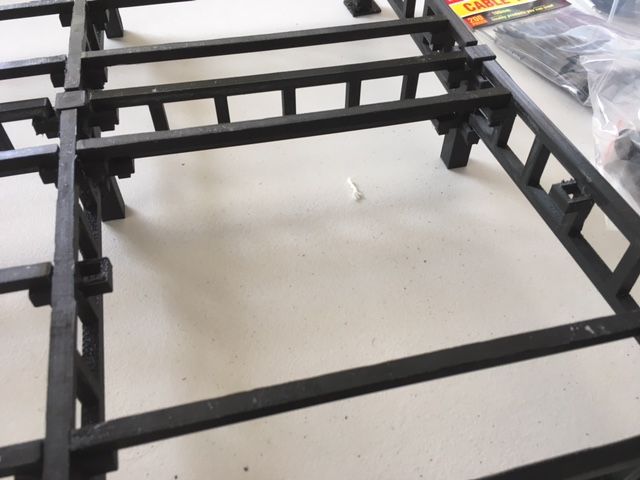
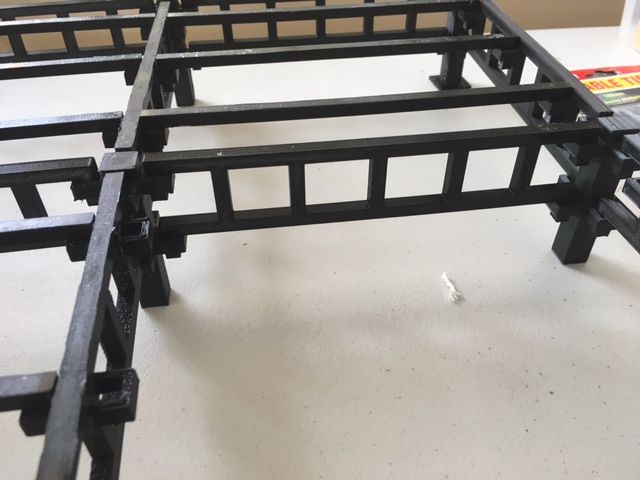
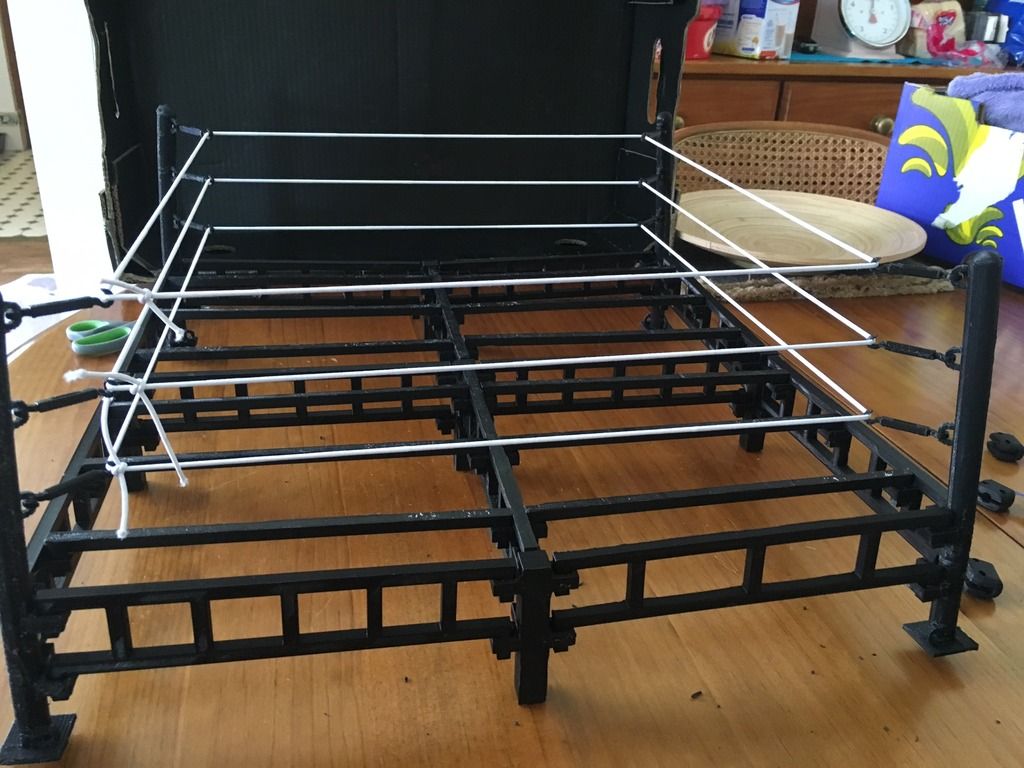
Hey guys, I used to be a member on here over 10 years ago when I used to modify my WWE rings to look more realistic. I've tried for the last few years to make fully custom scale rings made from aluminum and steel that required welding it together, but never got the quality that I wanted to the point I was willing to share it with the world, and I looked at it like a business and not a hobby, but its too time consuming to make them and sell them. I stumbled upon 3D Printing about a year ago, I was always pretty good with CAD back when I was in High School 10+ years ago. I've probably spent over a $1,000 just in research and design and tools over the last few years of attempts to make and surprisingly my wife hasn't killed me yet. I took some pictures as I went assembling it, I ended up swapping out my rounded ring posts later on for some square ones that I had printed months ago because I made a measurement error on it. Its a 16 inch ring, and to scale of the typical indy wrestling ring. 1 inch equals 1 foot. The ring posts(in the newer updated pictures) are 8" tall. The ropes are spaced 1 1/2" apart and 1 1/2" above the canvas, leaving a 3" floor height. I'll probably do a mod in the future which modifies the central support piece to support a spring to give the ring a good bump.
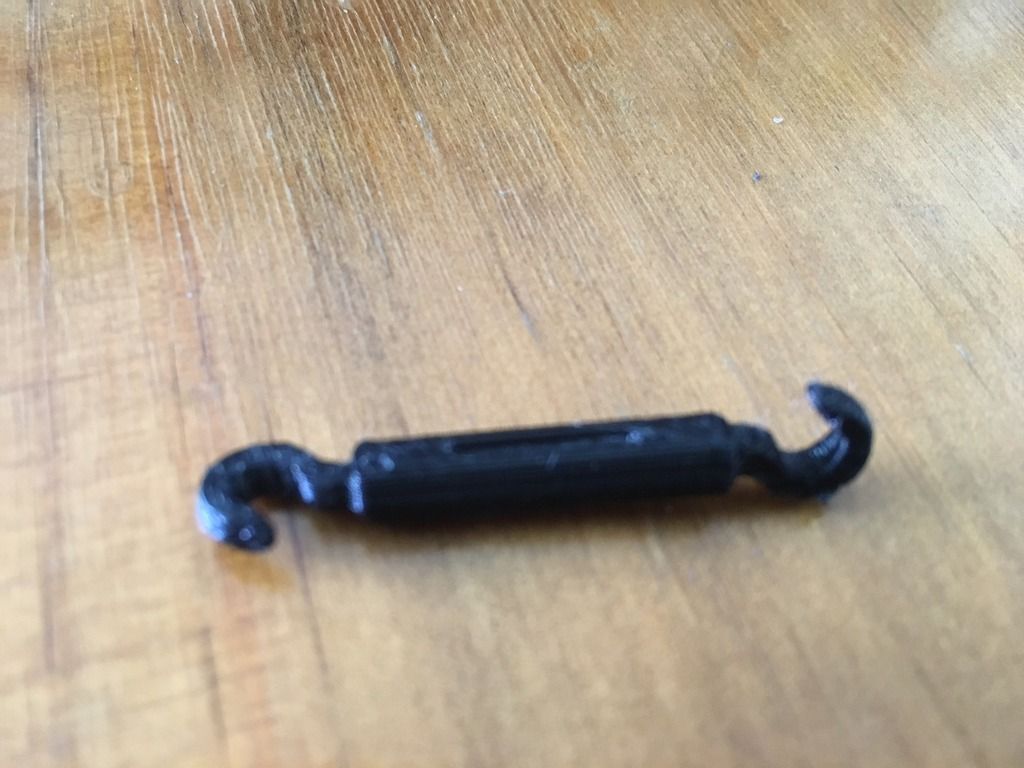
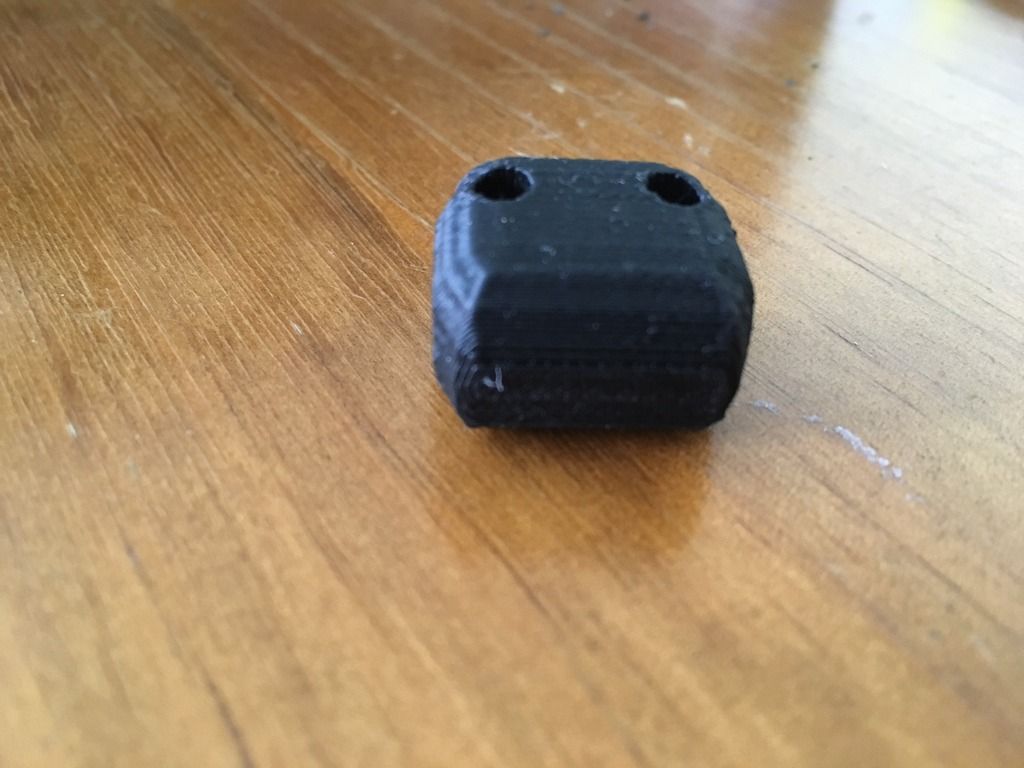
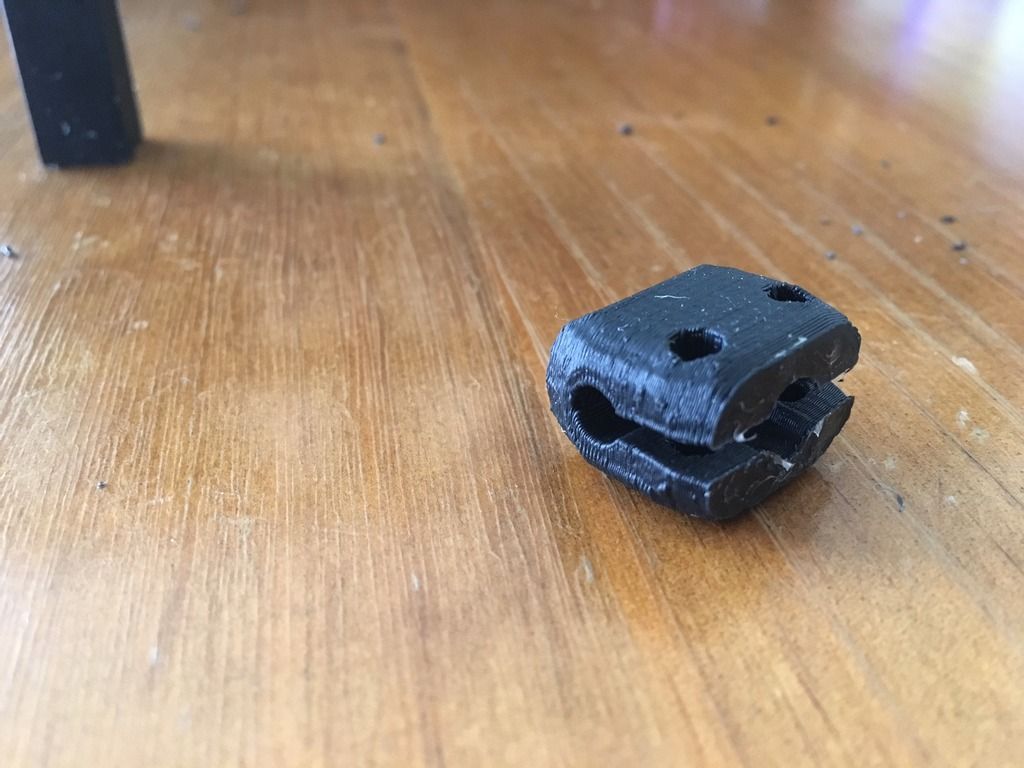
I had designed and printed these turnbuckles. This turnbuckle is 1 piece. I ended up swapping them out for a configuration I made of curtain rod wire and screw eyes. I don't remember what size the screw eyes were(I think around 16mm). I made enough for about 8 rings one day because I bought a lot in bulk. I worked for a guy who does CNC work and has a CNC Lathe. I might one day make a ton of them based on this 1 piece look because I'm not sure if its possible to do the threading on the inside of the buckle on one of those machines since turnbuckles are typically manufactured in big steel molds.
I used a typical 2mm elastic cord that I bought in bulk(check out the alibaba app if you like to DIY)
I designed these turnbuckle pads and had them printed in TPE, which is a rubber like material. I flexes amazingly. Its grooved out on the inside to fit the shape of the turnbuckle and rope running through it. If you want an interior picture of it just ask. I still need to get some small black cable ties to securely attach them but you can tie them with string pretty easily.
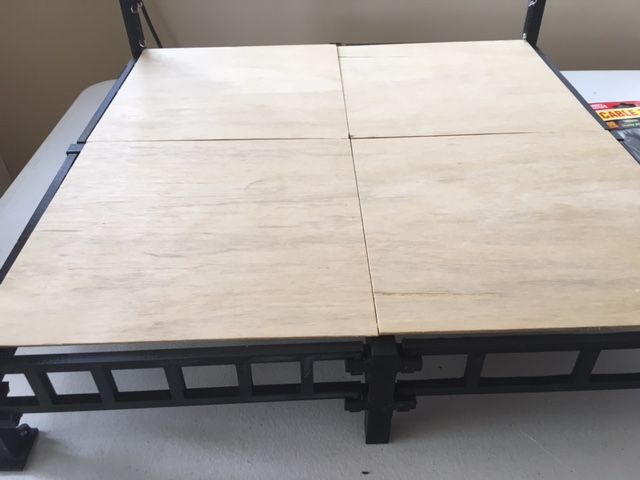
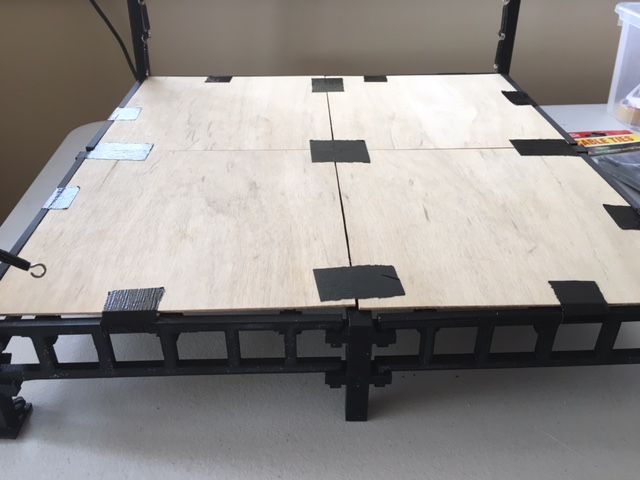
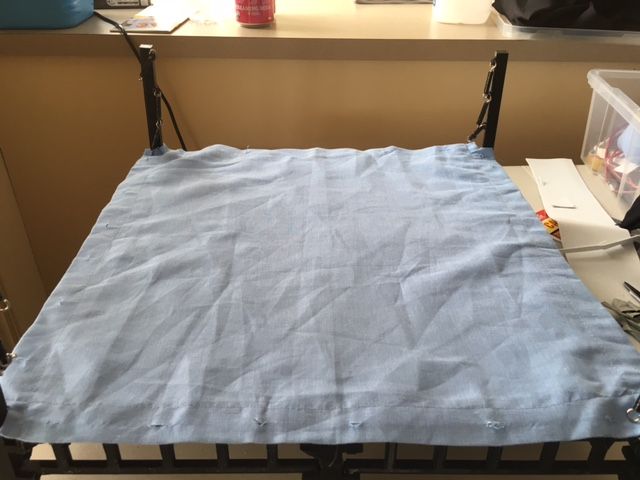
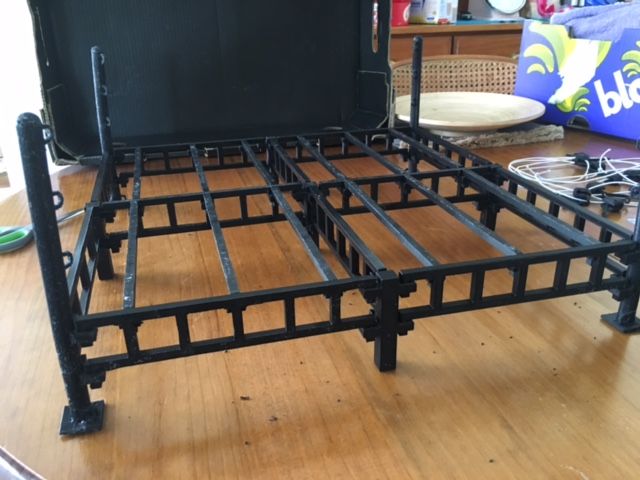
In what is probably the "budget" feature of the whole thing I the cardboard flooring. I gotta admit, its just so much easier to cut that that out than it is using my uncle's table saw and cutting single-ply, which I have in 8" squares, but I hate using them because it just doesn't fit right in the corners. With the cardboard I notched out the corners, and then taped them down to the frame.

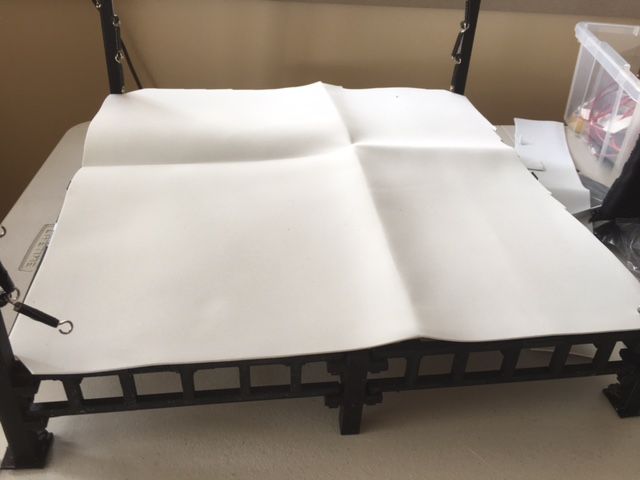
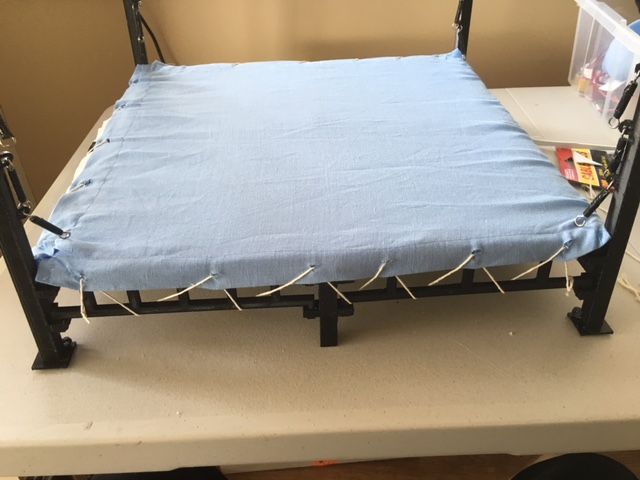
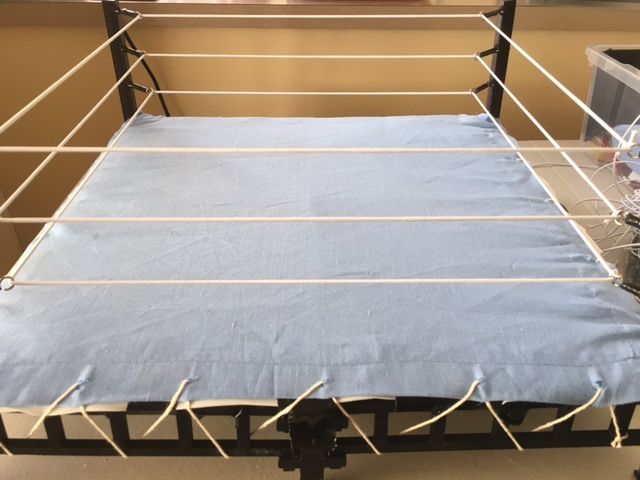
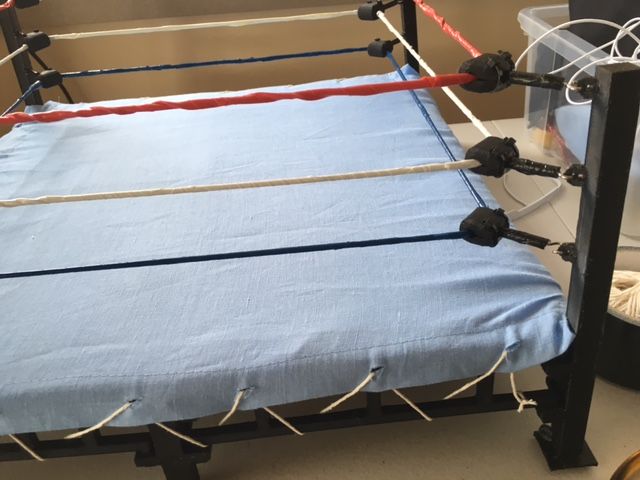
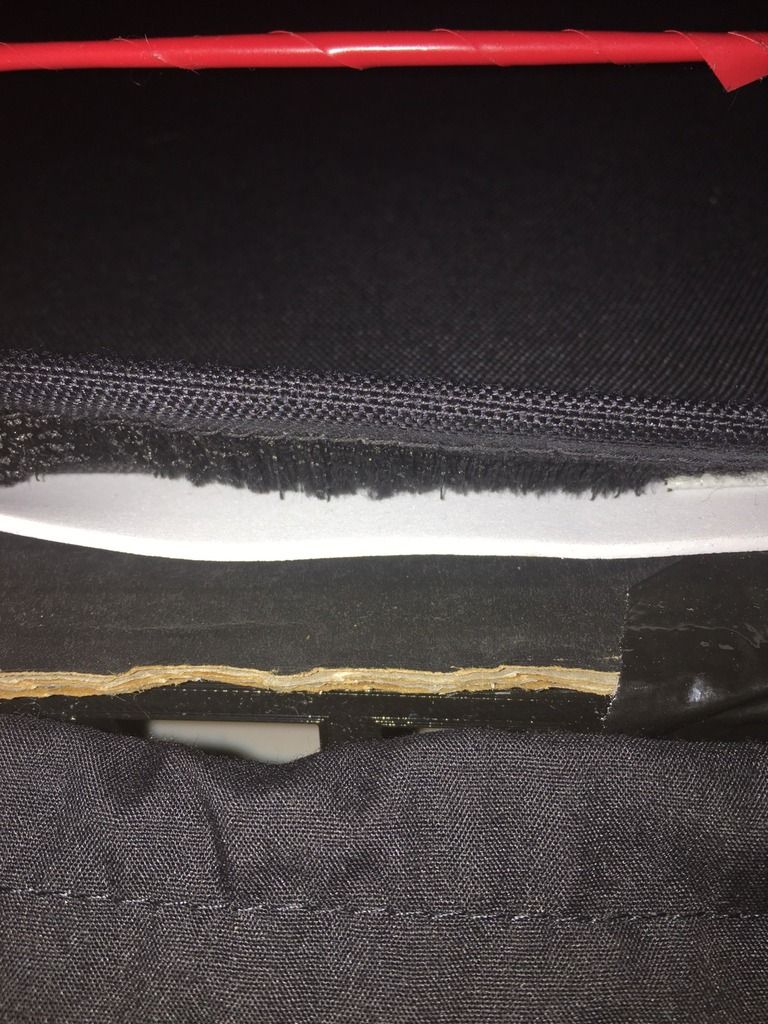
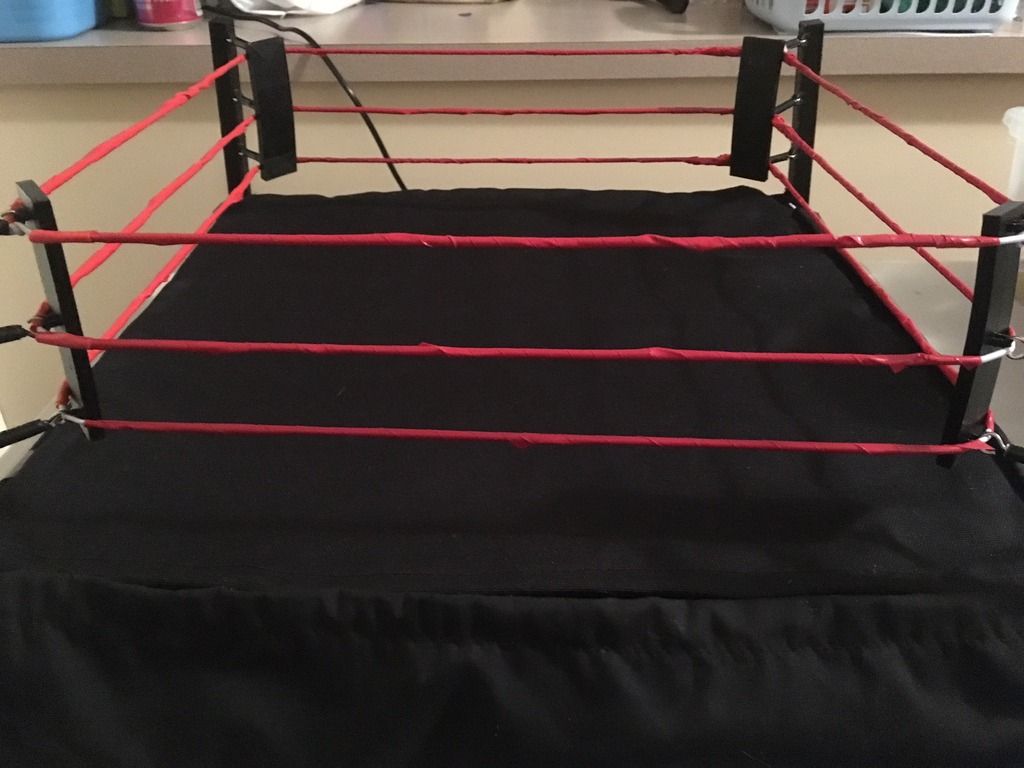
I fast forwarded quite a bit here. Above the cardboard is a foam sheet layer(picked that up off of the Alibaba app in bulk). I sewed up a nice black canvas and black aprons as well. Its good to have a wide range of skills if you want or like to DIY wrestling rings. I put some red tape on the ropes to try and give it more of a rope look. A part of it is peeling off. If you use a lighter to melt the nylon tape you can mold it into a more permanent shape. Just don't set it on fire or generate smoke from it. I might double up on the foam sheet though.
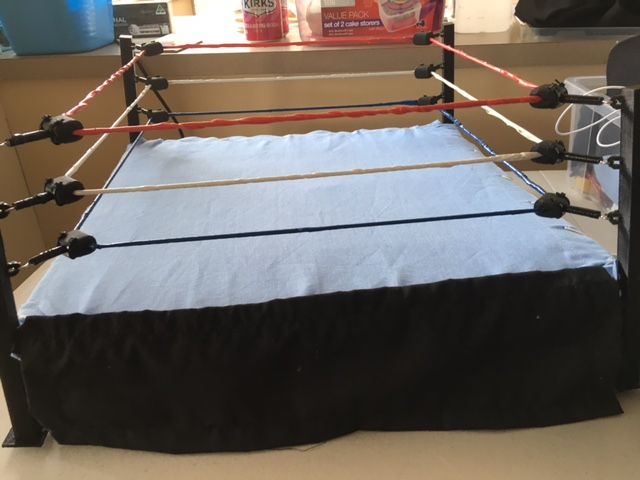
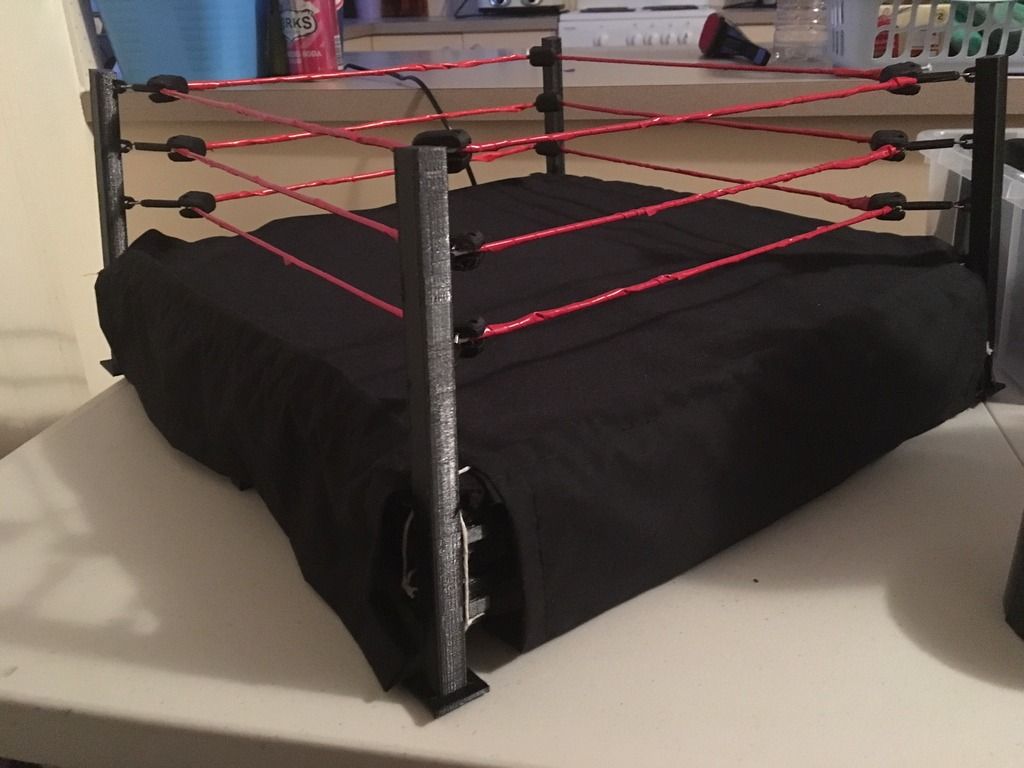
Here's a good look it nearly finished. The turnbuckle pads aren't fully secured yet, so some of them sit on the ropes differently than others. Despite the picture, when they're secured, they all look even. This one also has the updated curtain rod turnbuckles, taped black. They're definitely a much stronger alternative and are semi functional. These are also the square version of the ring posts. These are pretty strong. They're printed in PLA, which is your basic filament. If it was printed in ABS, it would be even stronger and have a more smooter finish. When I started 3D Printing a year ago through printing hubs, you only had a handful of filaments to choose from, now you can print in wood, metals, carbon fiber, and many more filaments, although they cost a lot more.
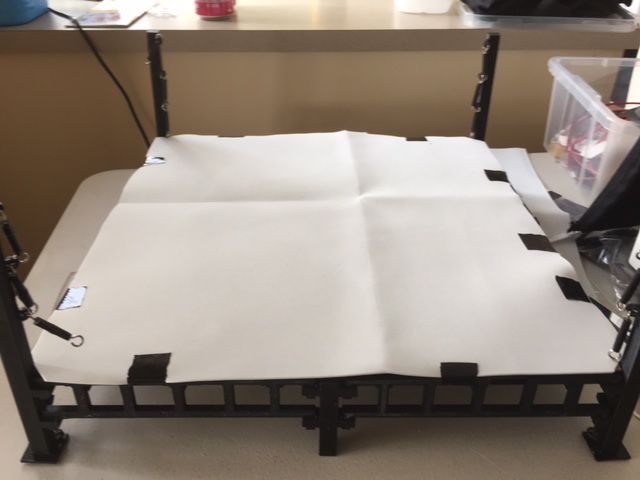
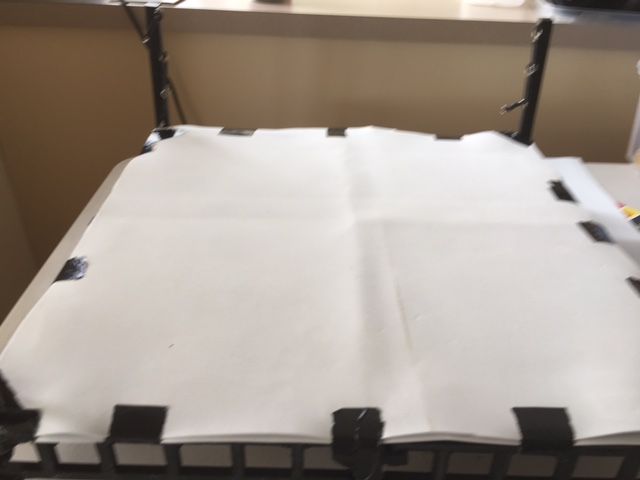
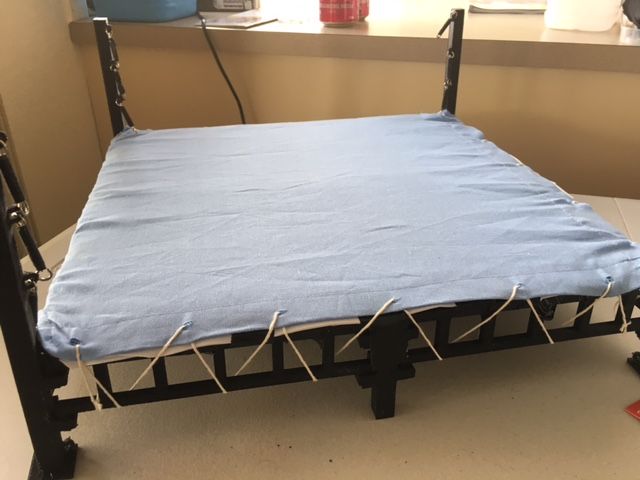
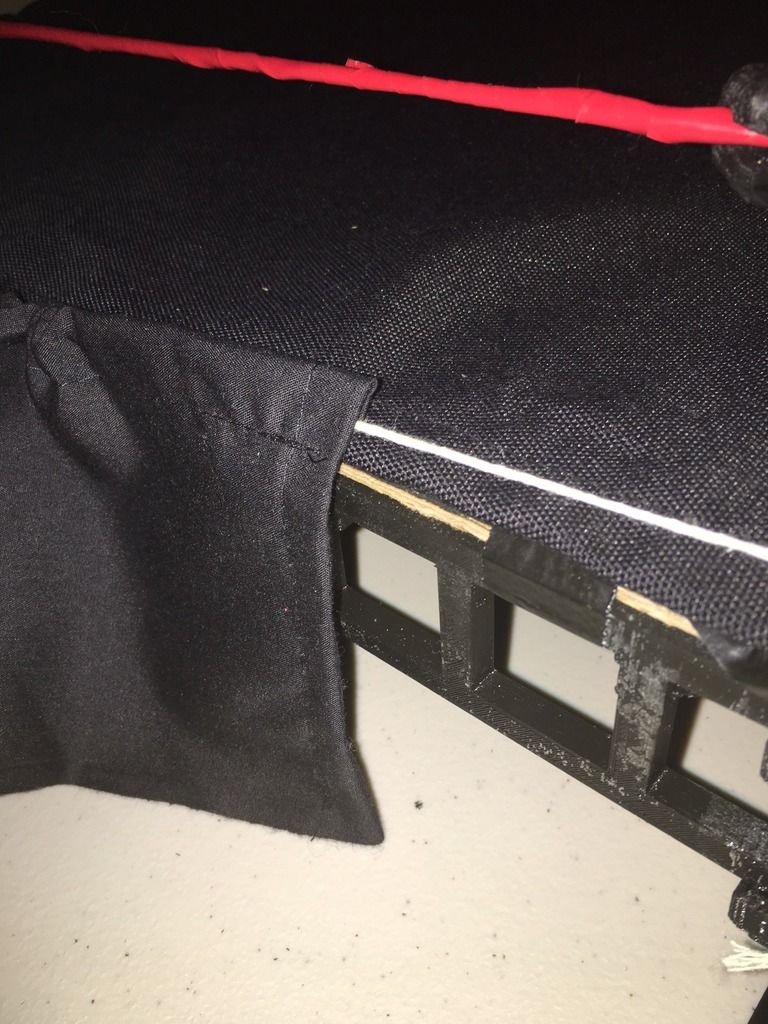
I used some tape and rolled it on itself to do a double sided tape config and put it on the foam sheet. Then I firmly pressed the canvas into it to attach it. I did about 3 of those on each side and I think that was so much easier and more efficient than putting in eyelets into the canvas and tying it down(which I had done in the past and was more of a nuisance). The apron has some string through it that is tied off on either side of the ring frame. Its pretty close to how its done in real life. That picture represents how its hung over the canvas and how you can move it. Once it has been worn in a bit it'll start to lay flat more easier.
And for the puroresu fans out there, the single pad! These corner pads were also printed in TPE rubber and flex really well. They have 3 loops on the back of them that hook into the turnbuckles to secure them. Its also easier to get the top and bottom ones in, as the middle one can be a bit difficult.
The ropes aren't super tight by any means, but its how I like it on the rings that I've made.
I might try and sell the digital files for it if there's support for it so you can print them yourself(whether you have a printer or go through a 3D Printing hub). I'd probably sell the files for around $4-5. But if people pirate them then I'd just stop creating altogether. I've exhausted the budget that I set aside for creating wrestling stuff, so if I'm able to make any money from it I can keep creating stuff. Some stuff I've made and designed already include guardrails, modular stage and entrances(think Wrestle Kingdom), modular lighting trusses, cages, 6 Sided Ring, UFC Octagon, modular scaffolding, ladders, breakable tables that break in multiple areas and clip back together. Ordering 3D prints is incredibly easy and I can give you a breakdown of how to order your prints, what quality settings to choose, what material to choose. I'm currently just doing a 16 inch model, because most printers don't have a big enough print surface to handle bigger models or flexibeam style setups. You could however print as many rings as you like, because my system is completely interchangeable and you could build a super ring if you desired to. I was never a fan of all the rings that WWE has put out through its various partners because they never had the same asthetic feel of how a ring is actually built, nor are they to actual real life scale. This is a kit with 57 pieces, not including the ropes, flooring, foam, canvas, or aprons. This is how wrestling rings are built(if you don't have a flexibeam ring). In Australian dollars the whole ring costs me about $125 through a hub, which is about $90 USD. If you print in other materials that price can go up quite a bit. I had to go through one hub to print all of my rubber parts, and another for all of the PLA parts You might have to filter through pages of hubs to find something cheaper, as some people try and charge a fortune. If you have your own printer that can print the max XYZ dimensions of these parts(max of my parts is7.75"L x 8.5"H), you might only spend about $25 in filament, which can make this hobby so much more cheaper than buying anything from a store ever again.
Hope you guys like it,
Travis
I had designed and printed these turnbuckles. This turnbuckle is 1 piece. I ended up swapping them out for a configuration I made of curtain rod wire and screw eyes. I don't remember what size the screw eyes were(I think around 16mm). I made enough for about 8 rings one day because I bought a lot in bulk. I worked for a guy who does CNC work and has a CNC Lathe. I might one day make a ton of them based on this 1 piece look because I'm not sure if its possible to do the threading on the inside of the buckle on one of those machines since turnbuckles are typically manufactured in big steel molds.
I used a typical 2mm elastic cord that I bought in bulk(check out the alibaba app if you like to DIY)
I designed these turnbuckle pads and had them printed in TPE, which is a rubber like material. I flexes amazingly. Its grooved out on the inside to fit the shape of the turnbuckle and rope running through it. If you want an interior picture of it just ask. I still need to get some small black cable ties to securely attach them but you can tie them with string pretty easily.
In what is probably the "budget" feature of the whole thing I the cardboard flooring. I gotta admit, its just so much easier to cut that that out than it is using my uncle's table saw and cutting single-ply, which I have in 8" squares, but I hate using them because it just doesn't fit right in the corners. With the cardboard I notched out the corners, and then taped them down to the frame.
I fast forwarded quite a bit here. Above the cardboard is a foam sheet layer(picked that up off of the Alibaba app in bulk). I sewed up a nice black canvas and black aprons as well. Its good to have a wide range of skills if you want or like to DIY wrestling rings. I put some red tape on the ropes to try and give it more of a rope look. A part of it is peeling off. If you use a lighter to melt the nylon tape you can mold it into a more permanent shape. Just don't set it on fire or generate smoke from it. I might double up on the foam sheet though.
Here's a good look it nearly finished. The turnbuckle pads aren't fully secured yet, so some of them sit on the ropes differently than others. Despite the picture, when they're secured, they all look even. This one also has the updated curtain rod turnbuckles, taped black. They're definitely a much stronger alternative and are semi functional. These are also the square version of the ring posts. These are pretty strong. They're printed in PLA, which is your basic filament. If it was printed in ABS, it would be even stronger and have a more smooter finish. When I started 3D Printing a year ago through printing hubs, you only had a handful of filaments to choose from, now you can print in wood, metals, carbon fiber, and many more filaments, although they cost a lot more.
I used some tape and rolled it on itself to do a double sided tape config and put it on the foam sheet. Then I firmly pressed the canvas into it to attach it. I did about 3 of those on each side and I think that was so much easier and more efficient than putting in eyelets into the canvas and tying it down(which I had done in the past and was more of a nuisance). The apron has some string through it that is tied off on either side of the ring frame. Its pretty close to how its done in real life. That picture represents how its hung over the canvas and how you can move it. Once it has been worn in a bit it'll start to lay flat more easier.
And for the puroresu fans out there, the single pad! These corner pads were also printed in TPE rubber and flex really well. They have 3 loops on the back of them that hook into the turnbuckles to secure them. Its also easier to get the top and bottom ones in, as the middle one can be a bit difficult.
The ropes aren't super tight by any means, but its how I like it on the rings that I've made.
I might try and sell the digital files for it if there's support for it so you can print them yourself(whether you have a printer or go through a 3D Printing hub). I'd probably sell the files for around $4-5. But if people pirate them then I'd just stop creating altogether. I've exhausted the budget that I set aside for creating wrestling stuff, so if I'm able to make any money from it I can keep creating stuff. Some stuff I've made and designed already include guardrails, modular stage and entrances(think Wrestle Kingdom), modular lighting trusses, cages, 6 Sided Ring, UFC Octagon, modular scaffolding, ladders, breakable tables that break in multiple areas and clip back together. Ordering 3D prints is incredibly easy and I can give you a breakdown of how to order your prints, what quality settings to choose, what material to choose. I'm currently just doing a 16 inch model, because most printers don't have a big enough print surface to handle bigger models or flexibeam style setups. You could however print as many rings as you like, because my system is completely interchangeable and you could build a super ring if you desired to. I was never a fan of all the rings that WWE has put out through its various partners because they never had the same asthetic feel of how a ring is actually built, nor are they to actual real life scale. This is a kit with 57 pieces, not including the ropes, flooring, foam, canvas, or aprons. This is how wrestling rings are built(if you don't have a flexibeam ring). In Australian dollars the whole ring costs me about $125 through a hub, which is about $90 USD. If you print in other materials that price can go up quite a bit. I had to go through one hub to print all of my rubber parts, and another for all of the PLA parts You might have to filter through pages of hubs to find something cheaper, as some people try and charge a fortune. If you have your own printer that can print the max XYZ dimensions of these parts(max of my parts is7.75"L x 8.5"H), you might only spend about $25 in filament, which can make this hobby so much more cheaper than buying anything from a store ever again.
Hope you guys like it,
Travis