Smackdown ring - made from scratch (completed)
May 24, 2015 21:03:11 GMT -5
Nick Maniwa, DZ: WF Legacy, and 28 more like this
Post by leehellewelluk on May 24, 2015 21:03:11 GMT -5
Hi everyone 
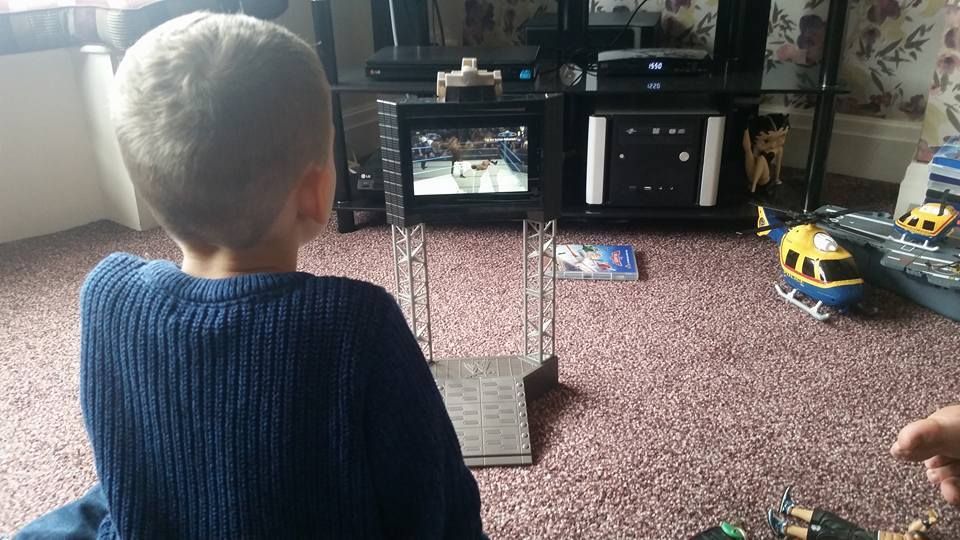
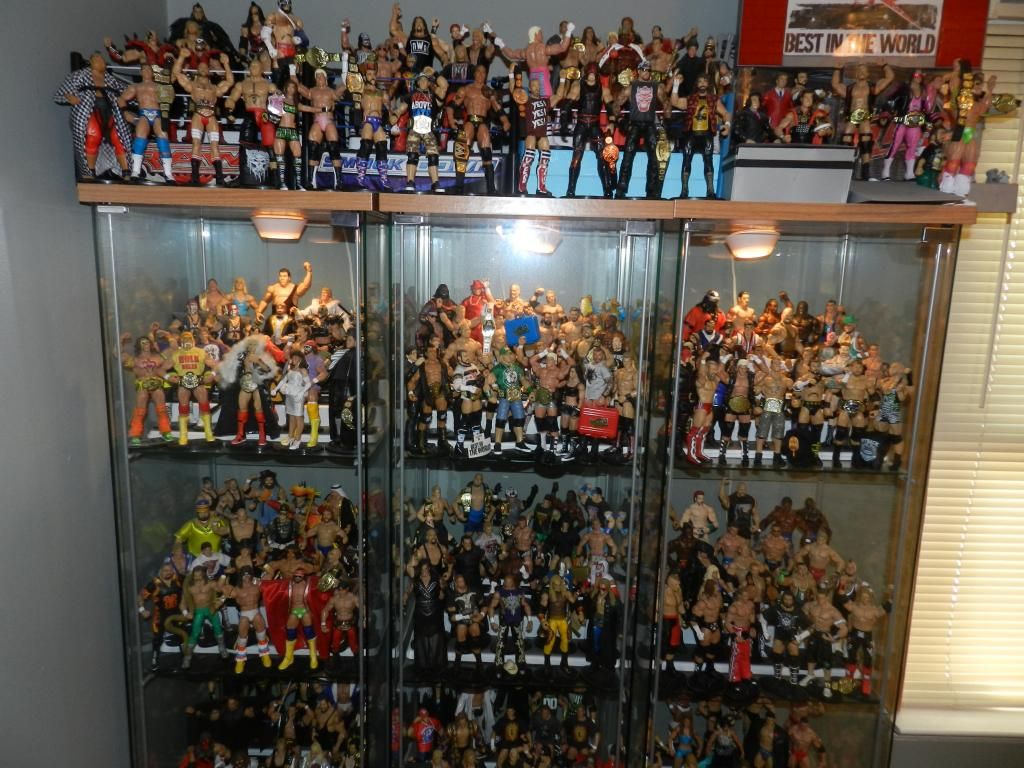
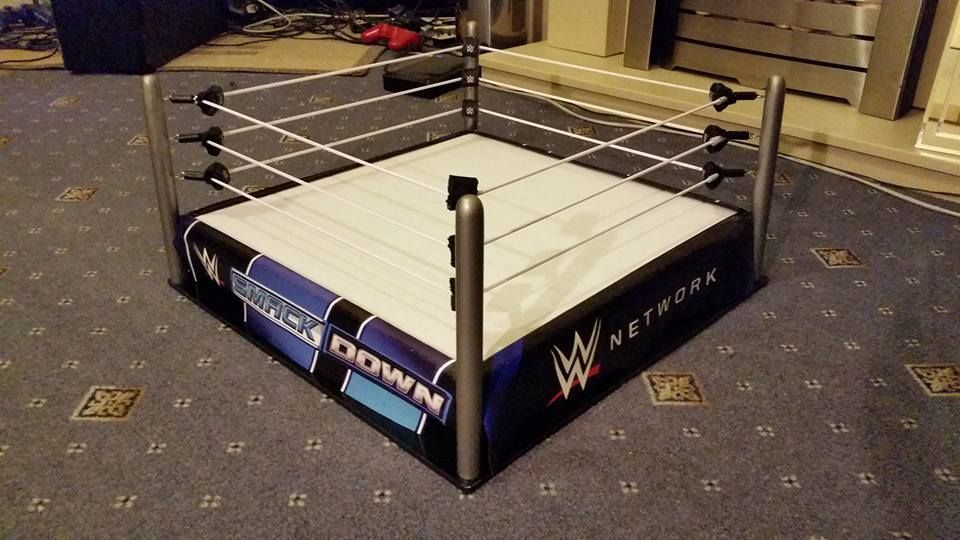
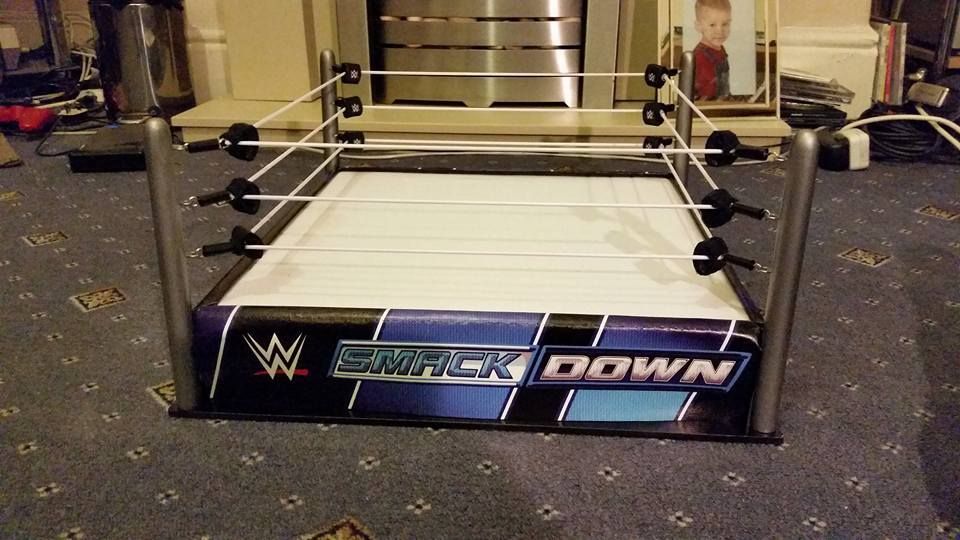
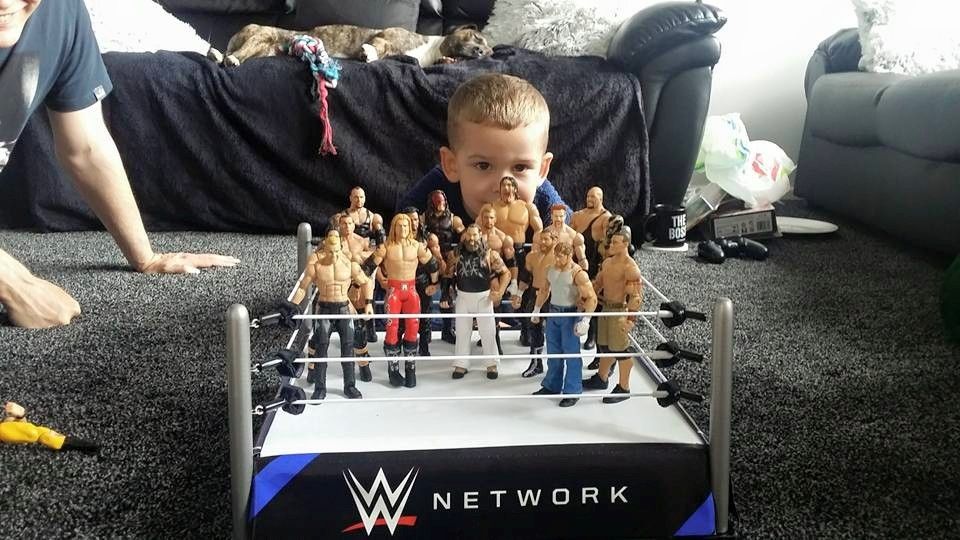
I thought I'd post my pics here since I've found this forum through searching for stuff when I was making this (a surprise gift for my nephew). They might give some other people some ideas. Here's pictures of the final thing and the happy little man with his shiny new wrestling ring...
And here's the (possibly) useful work in progress stuff...
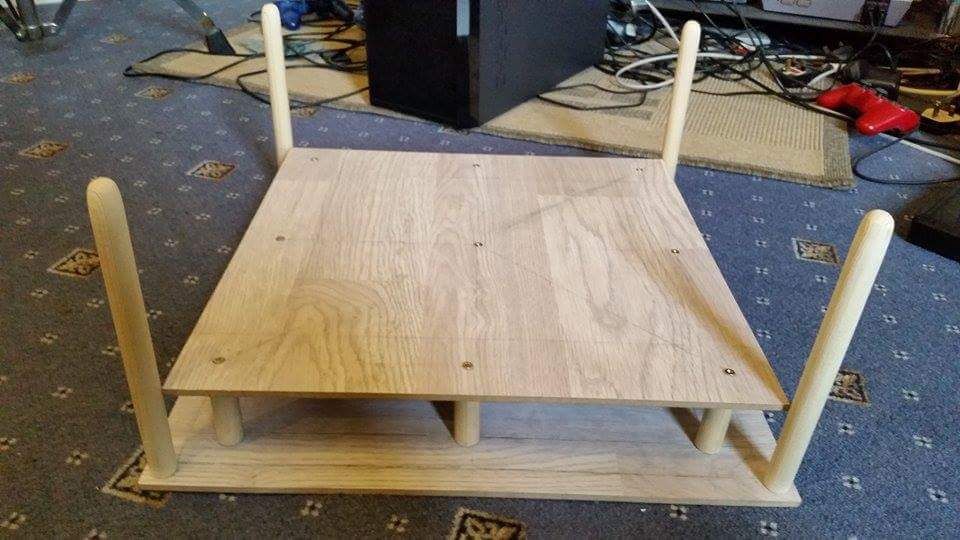
This is the basic structure of the thing. Sturdy enough to stand on. It's made from 18mm pine dowel moulding (from B&Q hardware store). The dowels beneath are 6cm high and the ring posts are 21cm high. The boards are 44cm for the bottom base and 40cm for the ring mat base.
The size of these boards is the only part that I'd change and make them 22" like the Elite WWE ring. This is to allow scope to use cloth turnbuckle pads that you can buy online rather than making your own or trying to get your hands on the real Elite turnbuckles at a reasonable price. They encroach a little further into the centre of the ring but it doesn't matter too much if the ring mat is is big enough.
Top tip: B&Q will cut stuff to size for you. The boards were cheap because they're just offcuts. I'd ask them if they'll cut the dowels to size too rather than hand sawing them to length like I did. You'll save yourself a lot of time getting the lengths to be all the same exact size.
Hopefully someone with an Elite ring can clarify the exact size of the ring mat base (I don't know if 22" includes the ring posts and it's important to know if you intend to buy/make ring skirts designed for this kind of ring).
Note: There are four extra screws to hold on the ring skirts that are not shown in this photo. See final photo at the bottom for further guidance on that part.
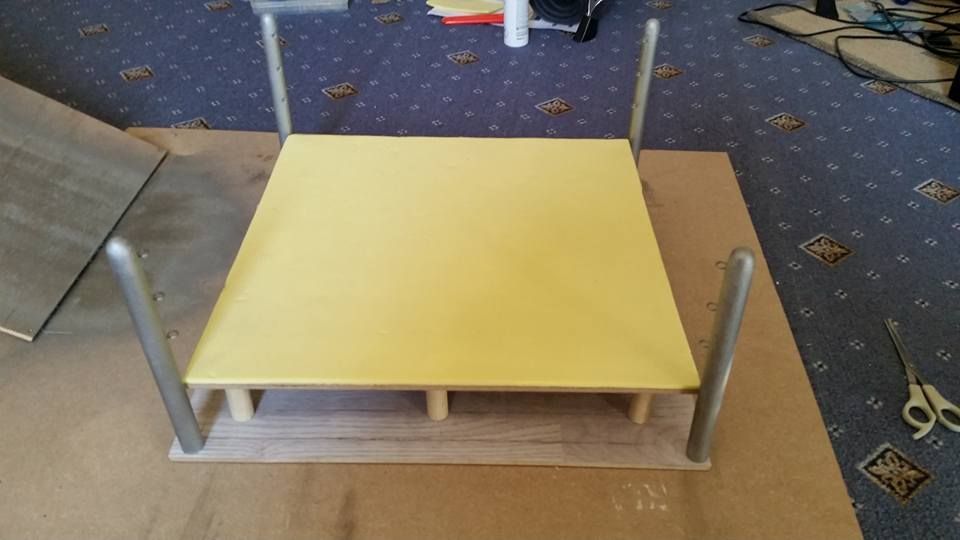
The base is covered with a layer of foam (made from a thin camping mat from B&M). The hooks on the ring posts (for the turnbuckles) are small picture hooks from a picture hanging kit (also from B&M). I based the points of these on the plastic ring; bottom hook is 4.5cm from the ring mat base and 13.5cm from the ring mat base for the top hook (you will have to add on the distance between the two boards to determine how far up your ring posts the holes need to be). The ring posts are spray painted silver and spray laquered.
Top tip: Shop around for spray paint. I saw cans of it in the 99p shop after spending a lot of money elsewhere. I don't know how good their paint is but it's worth testing before spending lots of money. Paint can become a big proportion of the cost to make this depending on what price you're paying.
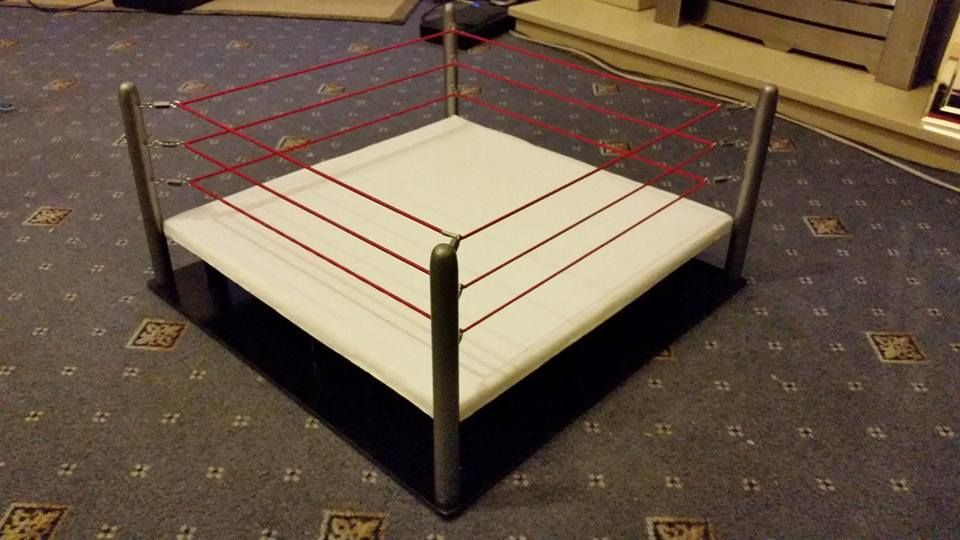
The base is spray painted black. The ring mat is cotton (made from a thick, white cotton shirt because I couldn't get my hands on the same kind of thick cotton at my local fabric shop). It is hand stitched the whole way around and I left a small gap between the ring mat base and the ring posts to ensure that it can be removed and washed.
Top tip: Always remove the ropes from two diagonally opposite ring posts before removing the ring mat. The tension of the ropes on those posts could mean you end up tearing the ring mat if you don't! (I found this out the hard way).
The small turnbuckles are the only piece that I don't make myself (I bought a kit designed for the old Jakks rings on Ebay). However, I've since found a video that shows how to make these yourself using net curtain wire:
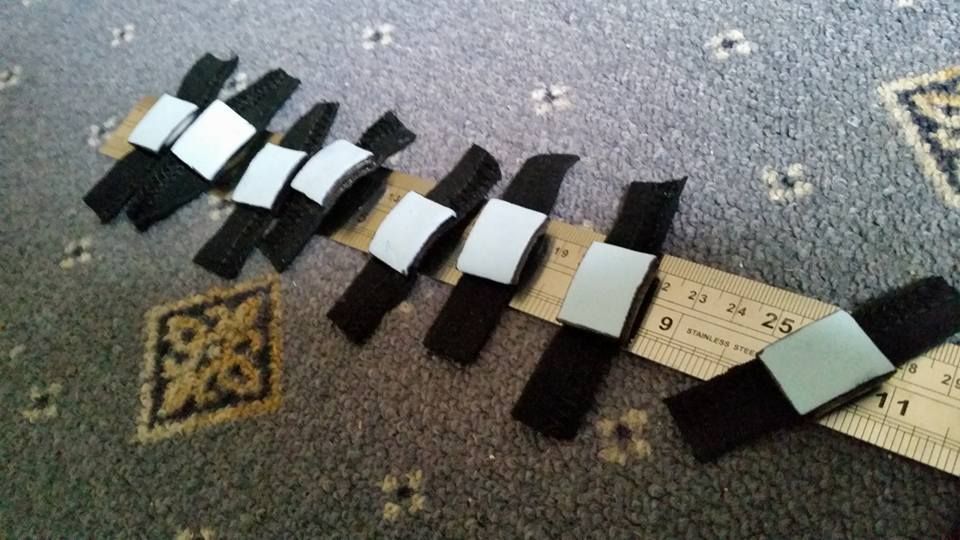
This is a work in progress photo of the turnbucke pads that took forever to make. Foam (camping mat again) PVA glued onto cut up strips of a black t-shirt. The visible sides are coloured black with marker pen and then PVA glued over so that it won't rub off on the ropes. The next step (sorry - no photo for this) is another strip of thsirt over the top of the whole legn of the ones you see above. These are stitched together along all the edges except for the foam part and then those flaps on the end are doubled over and stitched again to make them half as long but double the thickness
After this, print out small logos (the same size as the foam rectangles) and PVA glue them on. After that, another layer of PVA glue on the top of the logos.
Top tip: These look awesome but the process is very time consuming and may send you partially insane. Just make the ring bigger like I said earlier and buy cloth turnbuckle covers from the internet. They don't have the logos but you do get to keep your sanity. It's a good compromise.
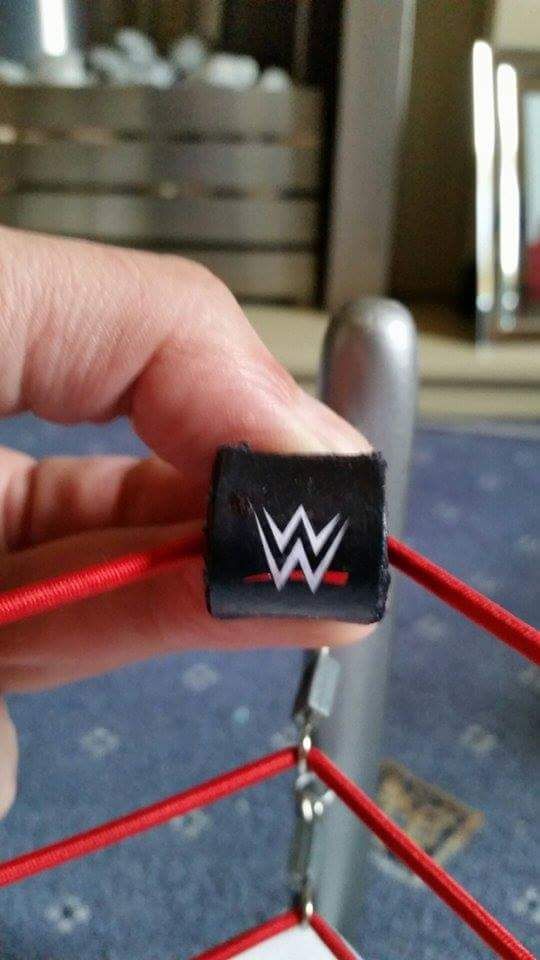
Here is a pic before they were attached (stitched on either side of the turnbuckle hooks).
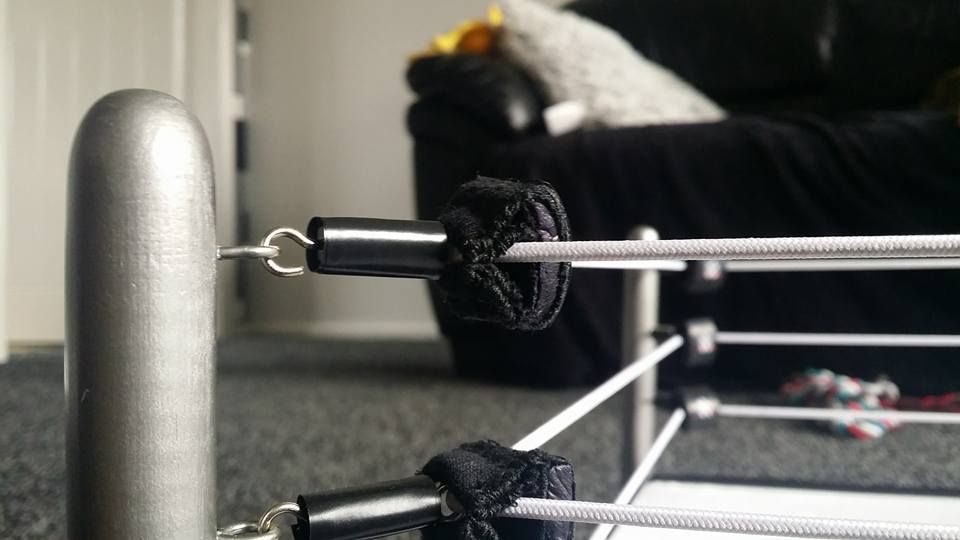
This is a side view when the whole thing was completed.
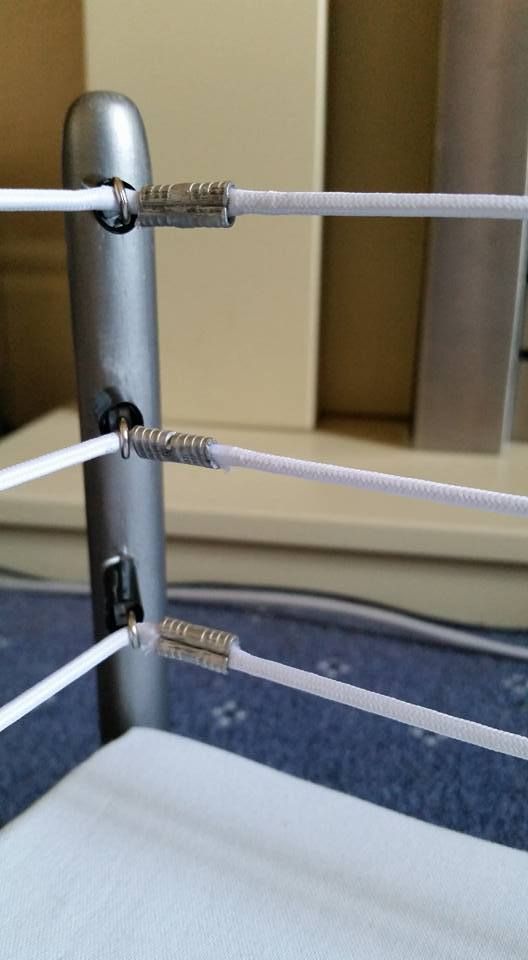
I made the ropes myself from string elastic (slightly thicker they usually use for the toy rings) and it's held together with the centre of 30 amp butt connector (car audio electricals available from places like Halfords). You cut away the plastic on the butt connector to get the metal part out of the middle, put a little superglue inside and then crimp the two ends of the 'rope' together with pliers. I then covered the metal parts with white electrical tape to make it neater.
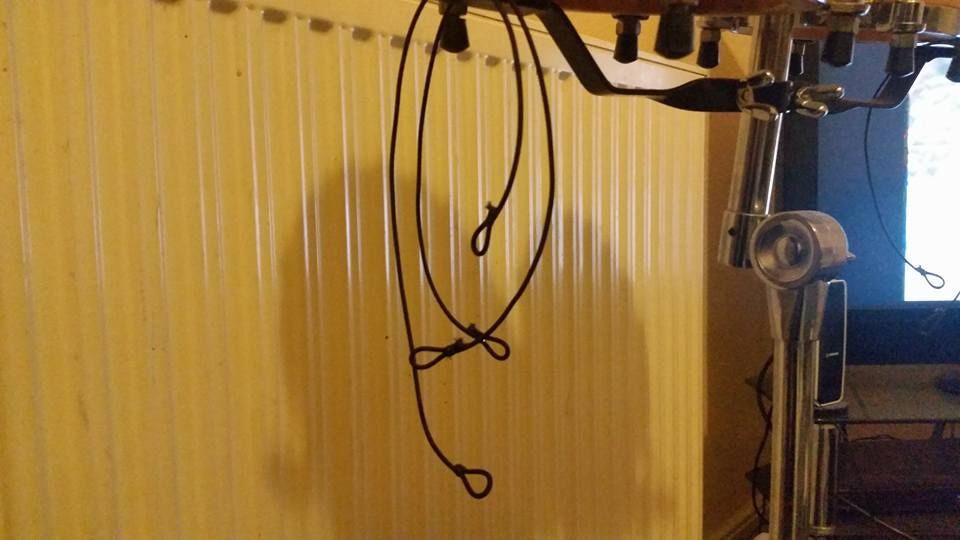
Finally, these string elastic pieces are what hold on the ring skirts. There are four flat head screws which are situated one square cm from each edge of the ring mat base which act as pegs. These elastic pieces go through the length of the ring skirts (there is a lip on the top of the ring skirts that are stitched over to hold the elastic inside). Those loops shown in the photo then just peg on beneath.
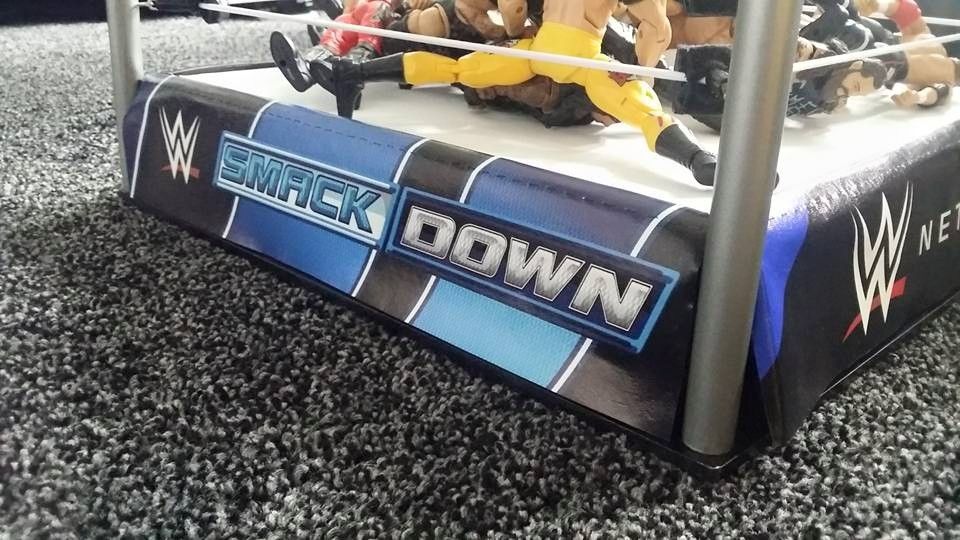
I designed the ring skirts in the computer to scale and had them printed at a t-shirt shop. They're basically transfers on a t-shirt that was printed up to size and then cut out using a stanley knife and ruler.
![]()
Final top tip: Always make sure you don't cut the end of your thumb off when using a stanley blade and a ruler. I've cut a chunk of my thumb off on this project doing just that. I had to make a new ring mat and glue new foam on the base because they ended up with blood splatters on it. It was not a good day.

I thought I'd post my pics here since I've found this forum through searching for stuff when I was making this (a surprise gift for my nephew). They might give some other people some ideas. Here's pictures of the final thing and the happy little man with his shiny new wrestling ring...


And here's the (possibly) useful work in progress stuff...

This is the basic structure of the thing. Sturdy enough to stand on. It's made from 18mm pine dowel moulding (from B&Q hardware store). The dowels beneath are 6cm high and the ring posts are 21cm high. The boards are 44cm for the bottom base and 40cm for the ring mat base.
The size of these boards is the only part that I'd change and make them 22" like the Elite WWE ring. This is to allow scope to use cloth turnbuckle pads that you can buy online rather than making your own or trying to get your hands on the real Elite turnbuckles at a reasonable price. They encroach a little further into the centre of the ring but it doesn't matter too much if the ring mat is is big enough.
Top tip: B&Q will cut stuff to size for you. The boards were cheap because they're just offcuts. I'd ask them if they'll cut the dowels to size too rather than hand sawing them to length like I did. You'll save yourself a lot of time getting the lengths to be all the same exact size.
Hopefully someone with an Elite ring can clarify the exact size of the ring mat base (I don't know if 22" includes the ring posts and it's important to know if you intend to buy/make ring skirts designed for this kind of ring).
Note: There are four extra screws to hold on the ring skirts that are not shown in this photo. See final photo at the bottom for further guidance on that part.

The base is covered with a layer of foam (made from a thin camping mat from B&M). The hooks on the ring posts (for the turnbuckles) are small picture hooks from a picture hanging kit (also from B&M). I based the points of these on the plastic ring; bottom hook is 4.5cm from the ring mat base and 13.5cm from the ring mat base for the top hook (you will have to add on the distance between the two boards to determine how far up your ring posts the holes need to be). The ring posts are spray painted silver and spray laquered.
Top tip: Shop around for spray paint. I saw cans of it in the 99p shop after spending a lot of money elsewhere. I don't know how good their paint is but it's worth testing before spending lots of money. Paint can become a big proportion of the cost to make this depending on what price you're paying.

The base is spray painted black. The ring mat is cotton (made from a thick, white cotton shirt because I couldn't get my hands on the same kind of thick cotton at my local fabric shop). It is hand stitched the whole way around and I left a small gap between the ring mat base and the ring posts to ensure that it can be removed and washed.
Top tip: Always remove the ropes from two diagonally opposite ring posts before removing the ring mat. The tension of the ropes on those posts could mean you end up tearing the ring mat if you don't! (I found this out the hard way).
The small turnbuckles are the only piece that I don't make myself (I bought a kit designed for the old Jakks rings on Ebay). However, I've since found a video that shows how to make these yourself using net curtain wire:

This is a work in progress photo of the turnbucke pads that took forever to make. Foam (camping mat again) PVA glued onto cut up strips of a black t-shirt. The visible sides are coloured black with marker pen and then PVA glued over so that it won't rub off on the ropes. The next step (sorry - no photo for this) is another strip of thsirt over the top of the whole legn of the ones you see above. These are stitched together along all the edges except for the foam part and then those flaps on the end are doubled over and stitched again to make them half as long but double the thickness
After this, print out small logos (the same size as the foam rectangles) and PVA glue them on. After that, another layer of PVA glue on the top of the logos.
Top tip: These look awesome but the process is very time consuming and may send you partially insane. Just make the ring bigger like I said earlier and buy cloth turnbuckle covers from the internet. They don't have the logos but you do get to keep your sanity. It's a good compromise.

Here is a pic before they were attached (stitched on either side of the turnbuckle hooks).

This is a side view when the whole thing was completed.

I made the ropes myself from string elastic (slightly thicker they usually use for the toy rings) and it's held together with the centre of 30 amp butt connector (car audio electricals available from places like Halfords). You cut away the plastic on the butt connector to get the metal part out of the middle, put a little superglue inside and then crimp the two ends of the 'rope' together with pliers. I then covered the metal parts with white electrical tape to make it neater.

Finally, these string elastic pieces are what hold on the ring skirts. There are four flat head screws which are situated one square cm from each edge of the ring mat base which act as pegs. These elastic pieces go through the length of the ring skirts (there is a lip on the top of the ring skirts that are stitched over to hold the elastic inside). Those loops shown in the photo then just peg on beneath.
I designed the ring skirts in the computer to scale and had them printed at a t-shirt shop. They're basically transfers on a t-shirt that was printed up to size and then cut out using a stanley knife and ruler.

Final top tip: Always make sure you don't cut the end of your thumb off when using a stanley blade and a ruler. I've cut a chunk of my thumb off on this project doing just that. I had to make a new ring mat and glue new foam on the base because they ended up with blood splatters on it. It was not a good day.


